Website speed isn’t just a technical metric—it directly influences user experience, SEO rankings, and conversion rates. For WordPress users, slow load times can frustrate visitors and send them straight to competitors. Many people assume the only way to speed up their WordPress site is to upgrade to more expensive hosting, but that’s not necessarily true.
With the right optimizations, you can dramatically improve your site’s performance without spending extra on premium hosting packages. In this guide, we’ll break down actionable steps to make your WordPress site faster while keeping your hosting bill exactly where it is.
Why Speed Matters in WordPress
- SEO impact: Google uses Core Web Vitals, including page load time, as ranking factors. A sluggish website may struggle to climb the search results.
- User experience: Visitors expect pages to load in under three seconds. Anything longer and bounce rates increase significantly.
- Conversions and sales: Whether you’re running a blog, e-commerce store, or portfolio, a fast site directly influences engagement and revenue.
Optimizing speed is therefore one of the highest ROI improvements you can make.
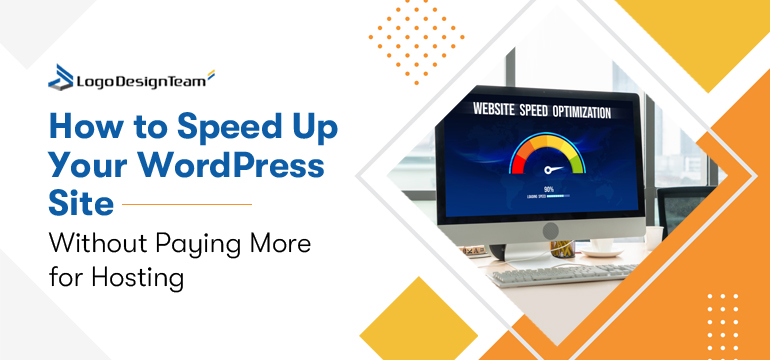
Step 1: Audit Your Current Speed
Before making changes, establish a performance baseline. Use free tools like:
- Google PageSpeed Insights
- GTmetrix
- Pingdom Website Speed Test
These tools will highlight bottlenecks such as unoptimized images, render-blocking scripts, or heavy plugins. Keep a record of your initial scores so you can measure improvements as you go.
Step 2: Choose a Lightweight Theme
Not all WordPress themes are created equal. Some come loaded with unnecessary scripts, sliders, and design elements that weigh down your site. Switching to a performance-focused theme can drastically reduce load times.
Recommended lightweight themes:
- GeneratePress
- Astra
- Neve
- Kadence
These themes are optimized for speed and work well with page builders and caching plugins.
Step 3: Optimize Images
Images are often the biggest culprits in slow page loading. Here’s how to fix that:
- Compress images: Use tools like TinyPNG or Imagify to reduce file size without noticeable quality loss.
- Serve next-gen formats: Switch to WebP or AVIF for superior compression compared to JPEG or PNG.
- Lazy load images: This ensures images load only when users scroll down to them, reducing initial page weight.
Step 4: Minify and Combine Files
Every CSS, JavaScript, or HTML file loaded on your site requires a separate HTTP request. Too many requests slow things down.
- Minify: Remove whitespace, comments, and unused code. Plugins like
Autoptimize or Fast Velocity Minify handle this automatically. - Combine files: Group smaller files into fewer requests, cutting down server load.
- Defer JavaScript: Delay non-critical scripts until after the main content has loaded.
Step 5: Leverage Caching
Caching stores static versions of your site so the server doesn’t need to rebuild pages for every visitor.
- Page caching: Plugins like WP Rocket, W3 Total Cache, or LiteSpeed Cache speed up repeat visits.
- Browser caching: Helps visitors load your site faster on return visits by storing assets locally.
- Object caching: Particularly useful for database-heavy sites like WooCommerce stores.
Step 6: Clean Up Your Database
Over time, your WordPress database accumulates clutter: post revisions, spam comments, transients, and plugin leftovers.
- Use plugins like WP-Optimize or Advanced Database Cleaner to schedule routine cleanups.
- Keep database tables lean for faster queries and reduced server stress.
Step 7: Limit and Optimize Plugins
Having dozens of plugins can create conflicts and bloat. Audit your plugin list and remove anything unnecessary.
- Replace multiple plugins with a single multipurpose plugin if possible.
- Avoid outdated or poorly coded plugins.
- Monitor performance with tools like Query Monitor to identify slow plugins.
Step 8: Use a Content Delivery Network (CDN)
A CDN stores copies of your website across multiple global servers. Visitors are served content from the nearest server, reducing latency.
Popular CDN options:
- Cloudflare (free plan is excellent for most WordPress sites)
- BunnyCDN
- KeyCDN
A CDN also adds a layer of protection against traffic spikes and DDoS attacks.
Step 9: Optimize Web Fonts
Custom fonts can add personality but also bloat. To optimize:
- Limit the number of font families and weights.
- Use system fonts where possible.
- Host Google Fonts locally for faster delivery.
Step 10: Enable GZIP or Brotli Compression
Compression reduces the size of files sent from your server to visitors’ browsers. Most modern hosts already support GZIP or Brotli, but you can also enforce it through plugins or .htaccess rules.
Step 11: Implement Critical CSS
Critical CSS ensures that above-the-fold content loads first, giving the perception of instant speed. Tools like WP Rocket or Critical CSS Generator can automate this process.
Step 12: Monitor with Ongoing Testing
Website performance isn’t a one-time task. After every theme update, plugin change, or content addition, re-test your site speed. Keeping optimization continuous ensures your site stays lean and efficient.
When to Consider Hosting Upgrades
Even with all the optimizations above, there may come a time when your site truly outgrows its hosting environment. For example, if you’re running a high-traffic WooCommerce store or content site with thousands of daily visitors, shared hosting may not cut it anymore.
When that happens, review the fastest WordPress hosting providers to see if scaling up is justified. But until then, maximizing your current hosting with the strategies above saves money and boosts performance.
Final Thoughts
Speeding up your WordPress site doesn’t have to mean spending more on hosting. By focusing on lightweight themes, optimizing images, enabling caching, cleaning databases, limiting plugins, and leveraging CDNs, you can achieve lightning-fast performance on your existing plan.
Remember: a fast site is not only better for your visitors but also strengthens your SEO rankings and conversion rates. Apply these techniques today, track your improvements, and only upgrade your hosting when growth genuinely requires it.
For other great tech tips, be sure to check out techitez.org